
TM 5-3895-379-23-1
0195
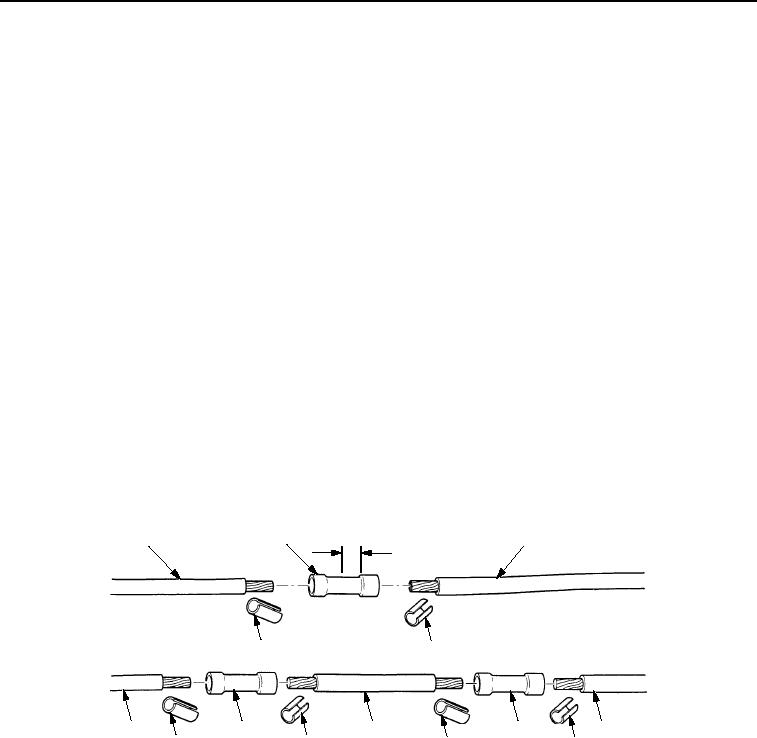
WIRE SPLICING USING BUTT CONNECTORS
NOTE
Whenever possible, use solder method of wire splicing. Refer to WIRE SPLICING USING
SOLDER METHOD in this work package.
If repairing a broken wire, perform Steps (1) through (4) only. If a section of wire is being
replaced, perform Steps (5) through (11).
1.
Remove damaged wire (Figure 2, Item 3) section.
2.
Remove insulation (Figure 2, Item 1) from both ends of wire (Figure 2, Item 3) equal to dimension A.
3.
Install butt connector (Figure 2, Item 2) over bare ends of wire (Figure 2, Item 3) and crimp securely over both
ends.
4.
Inspect splice and be sure no bare wire is visible.
5.
Install two butt connectors (Figure 2, Item 2) securely in place over wire (Figure 2, Item 3).
6.
Crimp one end of both butt connectors (Figure 2, Item 2) securely in place over wire (Figure 2, Item 3).
7.
Measure distance between two open ends of butt connectors (Figure 2, Item 2).
8.
Cut section of new wire (Figure 2, Item 5) 1 in. (2.54 cm) longer than distance measured in Step (7).
9.
Remove insulation (Figure 2, Item 4) from both ends of new wire (Figure 2, Item 5) equal to dimension A.
10.
Install bare ends of new wire (Figure 2, Item 5) into butt connectors (Figure 2, Item 2) and crimp securely into
place.
11.
Inspect splice and be sure that no bare wire (Figure 2, Item 3) is visible.
3
1
2
A
3
1
3
2
5
2
3
1
4
4
1
M0995SWR
Figure 2. Wire Splicing Using Butt Connectors.
END OF TASK
03/15/2011Rel(1.8)root(maintwp)wpno(M00133)