SECTION 10
BRAKES
a. Remove the brake drum capscrews, then release
the parking brake control lever. Remove the brake
drum.
b. Remove the brake shaft cotter pin, then remove
slotted nut. Remove hub and spacer.
c. Disconnect and remove the brake return springs.
Remove brake shoes.
d. Lift out the brake shoe actuator lever and
disconnect the control cable.
e. Remove backing plate capscrews, then remove the
backing plate.
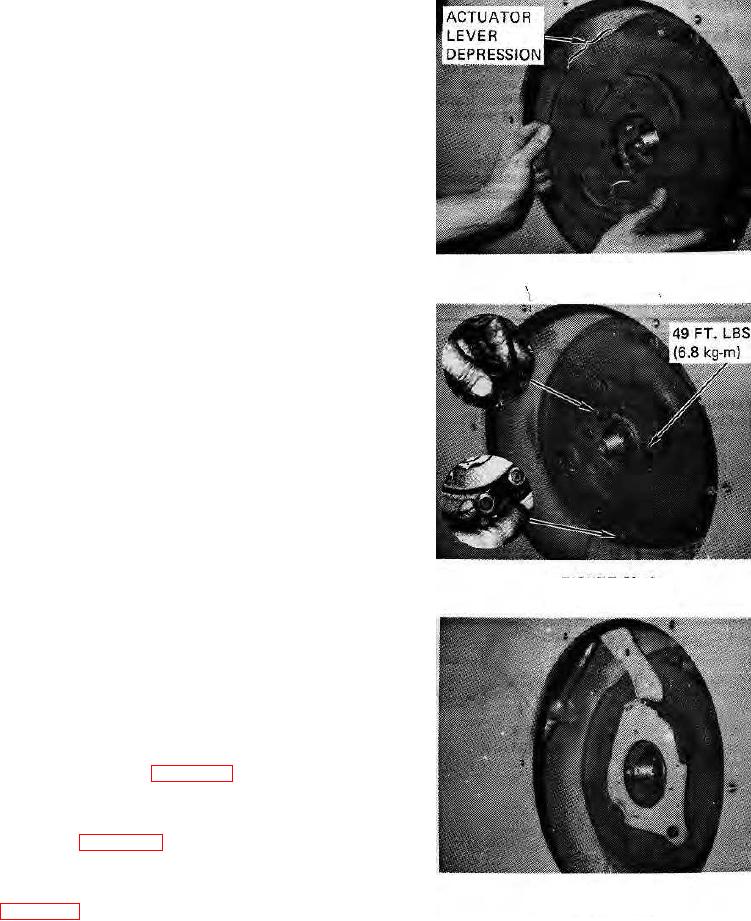
FIGURE 10-2.
10-8. CLEANING AND INSPECTION.
a. Use solvent to clean all metal parts except the
brake shoe assemblies. The shoe rib and table can be
wiped with a solvent dampened cloth. No solvent should
get on the lining.
b. Examine drum for cracks, heat checks and deep
grooves. The drums should not be bell-mouthed of
barrel-shaped, nor should the mounting holes be
elongated. If any of these conditions exist, the drum
should be replaced. Glaze on the drum, which is
otherwise in good condition, can be removed with
coarse sandpaper .
c. The brake shoe linings should be replaced if worn to
within 1115 inch (1.69 mm) or If bonding agent is failing.
Do not attempt to save lining soaked with oil or with
deep scores.
FIGURE 10-3.
d. Check springs and discard them If broken, rusted,
twisted, nicked or appear fatigued.
10-9. REASSEMBLY AND INSTALLATION.
CAUTION: Use only Hyster Approved replacement
parts.
a. Install backing plate with actuator lever depression
in position shown (see figure 10-2).
b. Install backing plate capscrews and torque to 49 ft.-
lbs. (6.8 kg-m). Then install rollers on both actuator
cranks (see figure 10-3).
c. Connect actuator lever to control cable, then
position actuator lever into backing plate as shown (see
FIGURE 10-4.
10-2.

