TM 5-3895-379-23-1
0093
INSTALLATION
WARNING
Adhesive causes immediate bonding on contact with eyes, skin or clothing and also gives
off harmful vapors. Wear protective goggles and use in well-ventilated area. If adhesive
gets in eyes, try to keep eyes open; flush eyes with water for 15 minutes and get
immediate medical attention.
Adhesives, solvents and sealing compounds can burn easily, can give off harmful vapors
and are harmful to skin and clothing. To avoid injury or death, keep away from open fire
and use in a well-ventilated area. If adhesive, solvent or sealing compound gets on skin
or clothing, wash immediately with soap and water.
NOTE
Ensure mating surfaces are clean.
1.
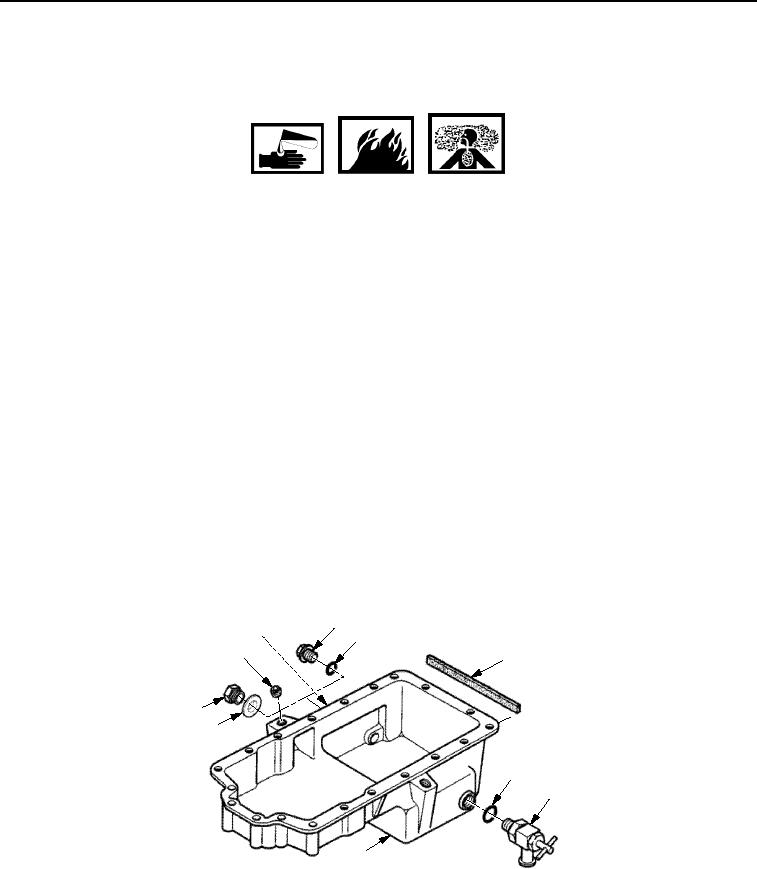
Install new gasket (Figure 3, Item 4) on oil pan (Figure 3, Item 7) using gasket cement.
CAUTION
Ensure drain valve is in the closed (full right) position after installation. Failure to follow this
caution may cause damage to equipment.
2.
Install new O-ring (Figure 3, Item 5) and drain valve (Figure 3, Item 6) on oil pan (Figure 3, Item 7). Place drain
valve in closed position.
3.
Install plug (Figure 3, Item 8) and insert (Figure 3, Item 1) on oil pan (Figure 3, Item 7).
4.
Install new O-ring (Figure 3, Item 3) and plug (Figure 3, Item 2) on oil pan (Figure 3, Item 7).
2
1
3
8
4
2
3
5
6
7
M1120SWR
Figure 3.
Oil Pan Installation.
03/15/2011Rel(1.8)root(maintwp)wpno(M00032)

