
TM 5-3895-379-23-1
0118
INSTALLATION - Continued
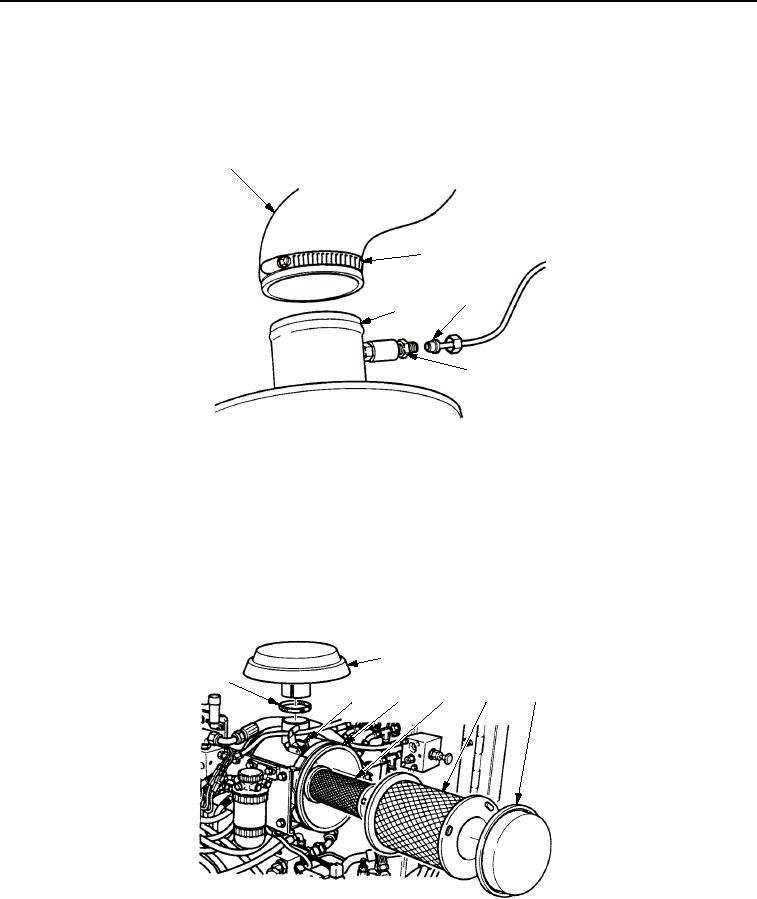
11.
Install hose (Figure 9, Item 1) on air cleaner body assembly (Figure 9, Item 3) and tighten clamp
(Figure 9, Item 2).
12.
Install tube (Figure 9, Item 4) on tube connector (Figure 8, Item 5).
1
2
4
3
5
M0482SWR
Figure 9.
Air Cleaner Elements and Air Cleaner Assembly Installation.
13.
Install cap (Figure 10, Item 2) on air cleaner body assembly (Figure 10, Item 4) and tighten clamp
(Figure 10, Item 1).
14.
Install secondary air cleaner element (Figure 10, Item 5) in air cleaner body assembly (Figure 10, Item 4).
15.
Install primary air cleaner element (Figure 10, Item 6) in air cleaner body assembly (Figure 10, Item 4).
16.
Install cover (Figure 10, Item 7) on air cleaner body assembly (Figure 10, Item 4) and close two latches
(Figure 10, Item 3).
2
1
5
7
3
4
6
M0483SWR
Figure 10.
Air Cleaner Elements and Air Cleaner Assembly Installation.
END OF TASK
03/15/2011Rel(1.8)root(maintwp)wpno(M00056)