
2.1.4 Injector Tube
DETROIT DIESEL 53
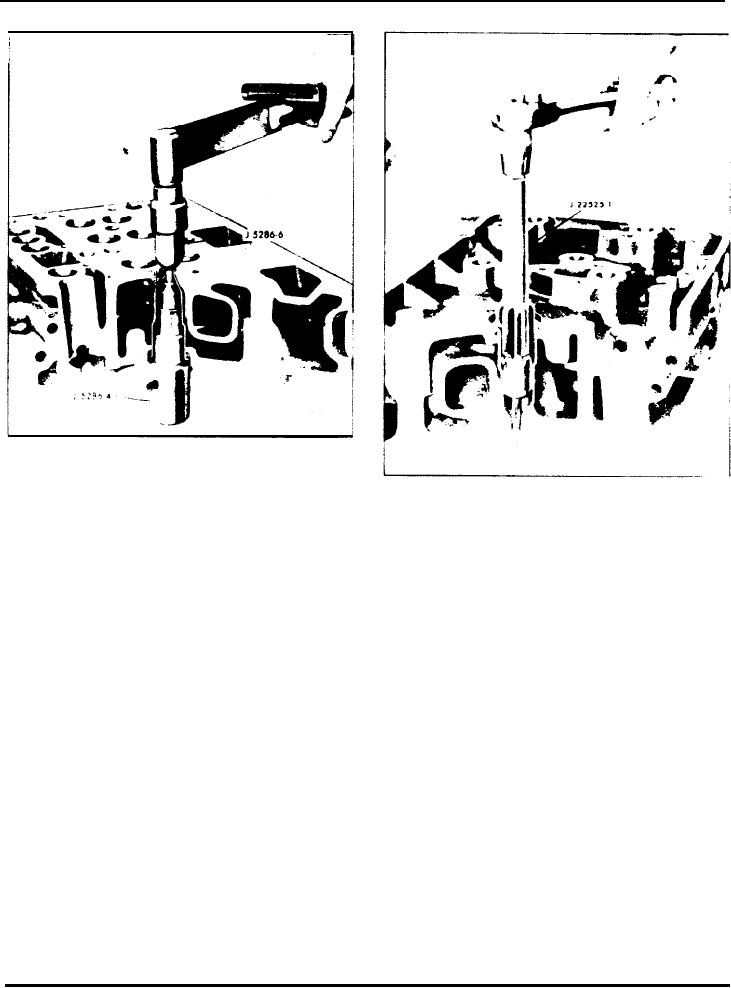
Fig. 3 Upsetting Infector Tube
J 5286-6 into the tapped end of the installer
Fig. 4 Reaming lnjector Tube for Injector
J 5286-4 (Fig. 3).
Body Nut and Spray Tip
b. Then, using a socket and torque wrench, apply
1. Ream the injector tube for the injector nut and
approximately 30 lb-ft torque on the upsetting
spray tip. With the cylinder head right side up and the
die.
injector tube free from dirt, proceed with the first
reaming operation as follows:
c. Remove the installing tools and ream the injector
tube as outlined below.
a. Place a few drops of light cutting oil on the
reamer flutes, then carefully position the reamer
J 22525-1 in the injector tube.
Roam Injector Tube
b. Turn the reamer in a clockwise direction
After an injector tube has been installed in a cylinder
(withdrawing the reamer frequently for removal
head, it must be finished in three operations: First,
of chips) until the lower shoulder of the reamer
hand reamed, as shown in Fig. 4, to receive the
contacts the injector tube (Fig. 4). Clean out all of
injector body nut and spray tip; second, spot-faced to
the chips.
remove excess stock at the lower end of the injector
tube; and third, hand reamed, as shown in Fig. 5, to
2. Remove excess stock:
provide a good seating surface for the bevel or the
lower end of the injector nut. Reaming must be done
a. With the cylinder head bottom side up, insert the
carefully and without undue force or speed so as to
pilot of cutting tool J 5286-8 into the small hole
avoid cutting through the thin wall of the injector
of the injector tube.
tube.
b. Place a few drops of cutting oil on the tool. Then,
NOTE: The reamer should be turned in a
using a socket and a speed handle, remove the
clockwise direction only, both when inserting
excess stock so that the lower end of the injector
and when withdrawing the reamer, because
tube is from flush to .005 " below the finished
movement in the opposite direction will dull the
surface of the cylinder head.
cutting edges of the flutes.
Page 2