TM 5-3895-382-24
Illustration 77
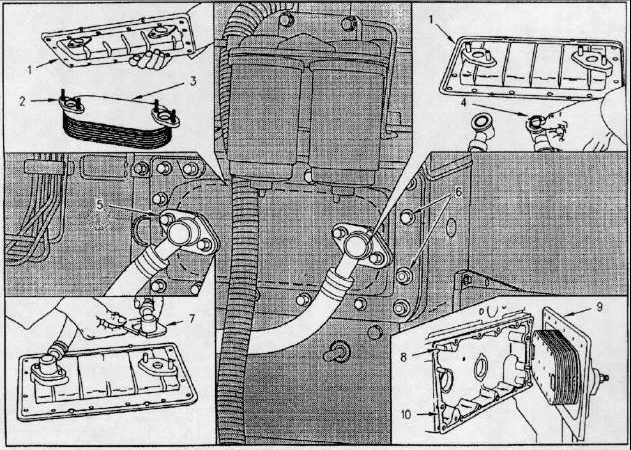
(1) Cover plate
(5) Nuts on stud for flange
(8) Stud
(2) Three-piece O-ring
(6) Nuts and bolts for cover plate
(9) Cover plate with cooling plate assembly
(3) Cooling plate
(7) Two-piece flange for connector of oil hose
(10) Gasket
(4) O-rings for connector of oil hose
Perform the following procedure in order to inspect the engine
oil cooler:
1.
Place a container under the oil cooler in order to collect
any engine oil or coolant that drains from the oil cooler.
Remove one of the oil hoses. Do not remove both of
the oil hoses at the same time in order to ensure that
cooling plate (3) remains fastened to cover plate (1)
when assembly (9) is removed.
Before removing the second oil hose, install two piece
flange (7) and the nuts on the studs for flange (5)
without the oil hose.
2.
Remove the nuts and bolts for cover plate (6). Remove
assembly (9). Remove O-rings (4).
3.
Thoroughly clean the flange face of the cover plate and
the cylinder block. If a sealant was used in order to
create the gasket, thoroughly remove the sealant from
the surfaces of the cylinder block and cover plate (9).
When assembly (9) is reassembled, use new paper
gasket (10).
4.
Place assembly (9) on a clean work surface. Remove
four nuts (5) that retain the two-piece flanges for the oil
hoses. Remove cover plate (1) from four studs of
cooling plate (3).
5.
Remove the three-piece O-tings (2). When the oil
cooler is reassembled, these O-tings must be replaced
with new O-tings.
6-79