
SECTION 4
MAINTENANCE
4-72. Make sure that the compressor takes in
b. Load compactor to desire weight.
clean air. Install the air strainer properly and
keep it clean. Air intake connections must be
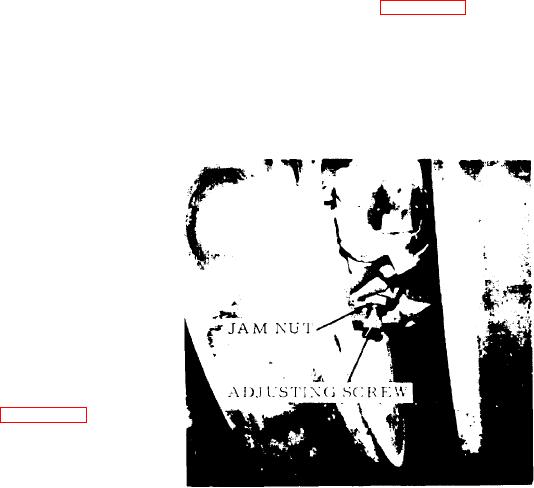
c. Loosen jam nut and turn adjusting screw
properly installed and maintained.
until the center wheel is vertical using wheel
rim for reference point (see figure 4-10).
4 - 7 3 . Check mounts for tightness and drive
belt for proper tension.
d. Tighten jam nut.
4-74. Inspect oil supply line and water lines for
e. Readjust when ballast weight is changed.
proper installation. Check the unloader mech-
anism for operation.
NOTE: If the wheel is tilted to the right, it is
loaded too much. If it tilts to the left, it
4-75. AIR LEAKAGE TESTS.
is not sufficiently loaded.
4-76. Leakage past the discharge valves can be
detected by removing the discharge line,
applying shop air back through the discharge
port and listening for escaping air.
4-77. The discharge valves and the unloader
pistons can be checked for leakage by building
up the air system until the governor cuts out,
and by stopping the engine. Listen for
e s c a p i n g air at the intake. To pin-point air
leakage, squirt soapy water around the
unloader pistons. If they don t leak, then the
discharge valves may leak.
4-78. REAR CENTER WHEEL SPRING
ADJUSTMENT (see figure 4-10).
NOTE: Spring adjustment depends on the rear
ballast load.
a. Place the compactor on a flat, even
FIGURE 4-10. REAR CENTER WHEEL SPRING
surface.
ADJUSTMENT.
4-12.