
TM 5-3895-346-14
HYDROSTATIC SYSTEM
REPAIR
REPAIR PROCEDURE
REPLACEMENT OF CHARGE PUMP
REMOVAL
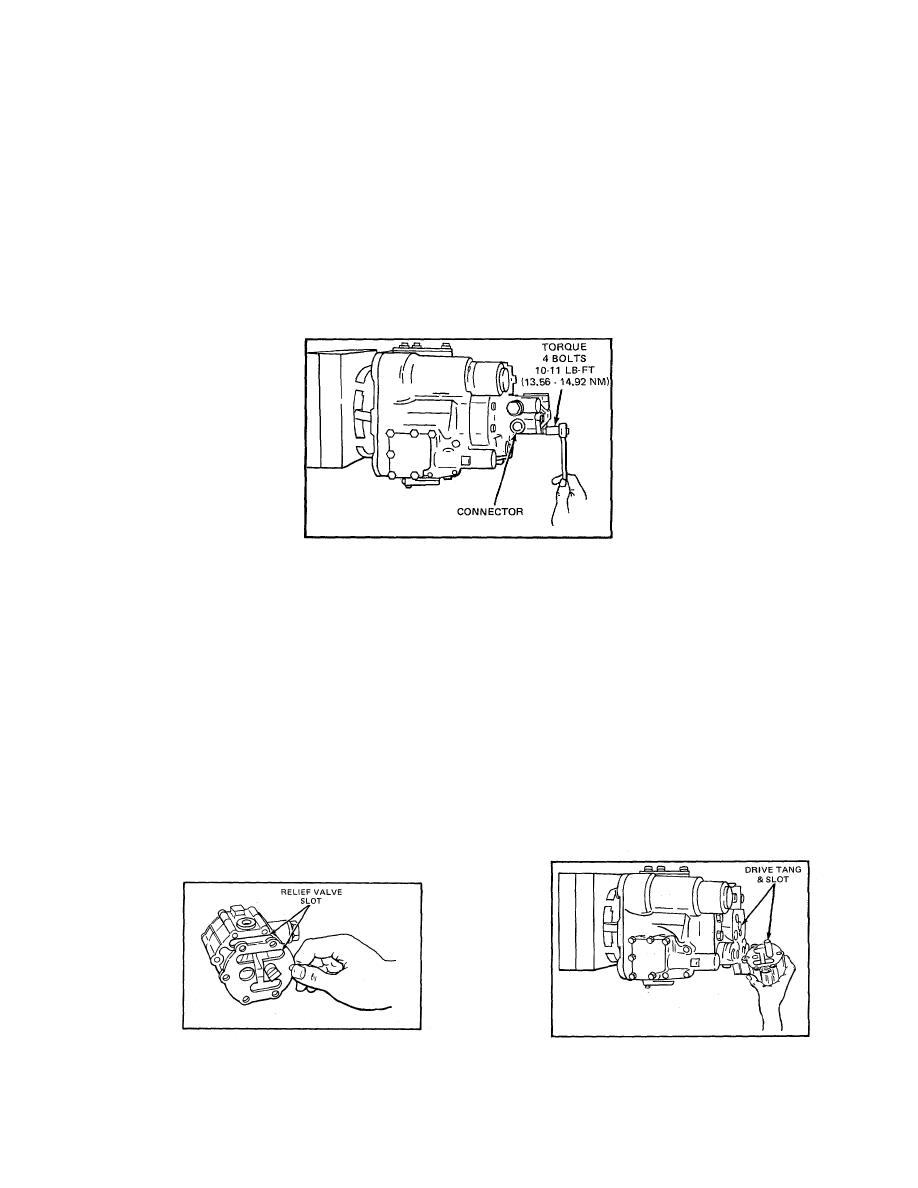
1. Remove the line connecting charge pump to reservoir and plug with clean plastic plug to prevent draining
of reservoir.
2. Remove the four capscrews.
NOTE
Do not remove the capscrew at the top and bottom of the charge pump, as these hold the charge pump
together. (Refer to Fig. 1.)
Figure 1.
3. Pull charge pump away from main pump.
NOTE
Do not use sharp tools to pry charge pump from main pump. A scratch on the sealing surface may cause a
leak. If charge pump does not pull loose, tap lightly on side of charge pump with plastic hammer to break paint
or gasket seal.
INSTALLATION
1. Install a new gasket. Make sure the new gasket is properly installed (refer to Fig. 2). If positioned wrong
the relief valve port is covered by the gasket.
2. Line up the drive tang on charge pump shaft with slot in main pump shaft (refer to Fig. 3). The charge
pump should assemble freely with main pump freely. Do not force charge pump into position.
3. Tighten the four mounting bolts to 10-1 lb ft (13.56-14.92 Nm) torque.
Figure 2.
Figure 3.
503
