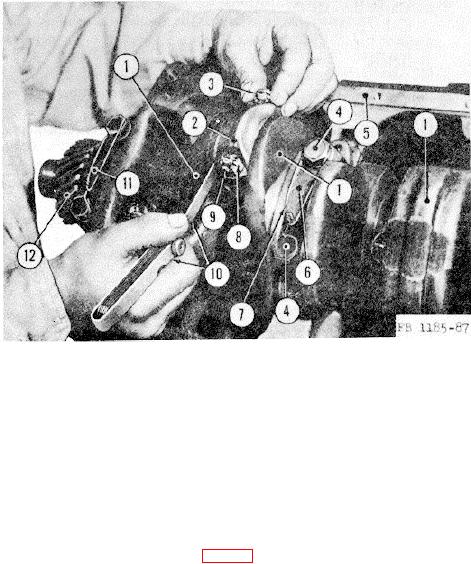
1
Crankshaft
7
Lock wire
2
Connecting rod cap
8
Cotter pin
3
Connecting rod bolt
9
Connecting rod cap nut
4
Main bearing cap screw
10
Feeler gage
5
11
Front main bearing cap
6
Main bearing cap
12
Crankshaft gear
Figure 87. Checking connecting rod side clearance.
c. Disassembly.
(1) Pull out the master clutch shaft bearing (3, fig. 88) from the center of the flywheel (2).
Note. The flywheel gear should not be removed from the flywheel unless a new one is needed,
and available, for replacement.
(2) Use a cold chisel to cut into the flywheel gear (5) between two of the teeth.
(3) Hammer the chisel a few times to expand the flywheel gear (5) a few thousandths of an inch.
(4) Tap the flywheel gear (5) off the flywheel (2).
d. Inspection. Inspect the flywheel carefully for cracks and breaks.
Check the surface of the flywheel contacted by the clutch for warpage and scoring. Inspect the flywheel gear for broken,
damaged, or worn teeth. Replace the flywheel gear if excessively worn. Check the master clutch bearing for cracked,
pitted, or scored balls. Inspect the cones for cracks, wear, and grooving. Replace the bearing if it is sticking, binding, or if
the cones or rollers are worn, cracked, or damaged.
e. Repair.
(1) Chuck the flywheel in a lathe if the surface contacted by the clutch is warped or scored.
216

