TM 5-3895-382-24
Replace Filter(s)
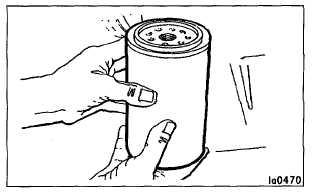
1.
Use a 2P-8250 Filter Wrench to remove the oil
filter.
Element with debris.
2.
Use a 4C-5084 Oil Filter Cutter (which replaced
the former 6V-7905 Service Tool) to cut the oil
filter open. Spread pleats apart and inspect the
element for metal debris. An excessive amount of
debris in the oil filter element may be indicative of
early wear or a pending failure.
Use a magnet to differentiate between the ferrous and
non-ferrous metals found in your oil filter element.
Ferrous metals may indicate wear on the steel and cast
iron parts of your engine. Non-ferrous metals may
indicate wear on the aluminum, brass or bronze parts of
your engine, such as crankshaft (main) bearings,
turbocharger bearings and cylinder head wear.
Due to normal wear, friction, etc., it is not uncommon to
find small amounts of debris in your oil filter element.
Consult your Caterpillar dealer to arrange for further
analysis if an excessive amount of debris is found in
your oil filter element.
3.
Wipe the sealing surface of the filter mounting
base. Make sure all of the old gasket is removed.
NOTE: Change oil filter(s) at every oil change. Make
sure to use the correct Caterpillar oil filter(s)
for your engine arrangement.
NOTICE
Caterpillar
oil
filters
are
built
to
Caterpillar
specifications. Use of an oil filter not recommended
by Caterpillar could result in severe engine damage
to your engine bearings, crankshaft, etc., as a result
of the larger debris particles from unfiltered oil
entering your engine lubricating system.
4.
Apply a small amount of clean engine oil to the
new filter gasket.
Maintenance Section
Every 250 Service Hours or 3 Months
1-73