
TM 5-3895-379-23
UNIVERSAL JOINT AND SHAFT MAINTENANCE- CONTINUED
0190 00
DISASSEMBLY - CONTINUED
1.
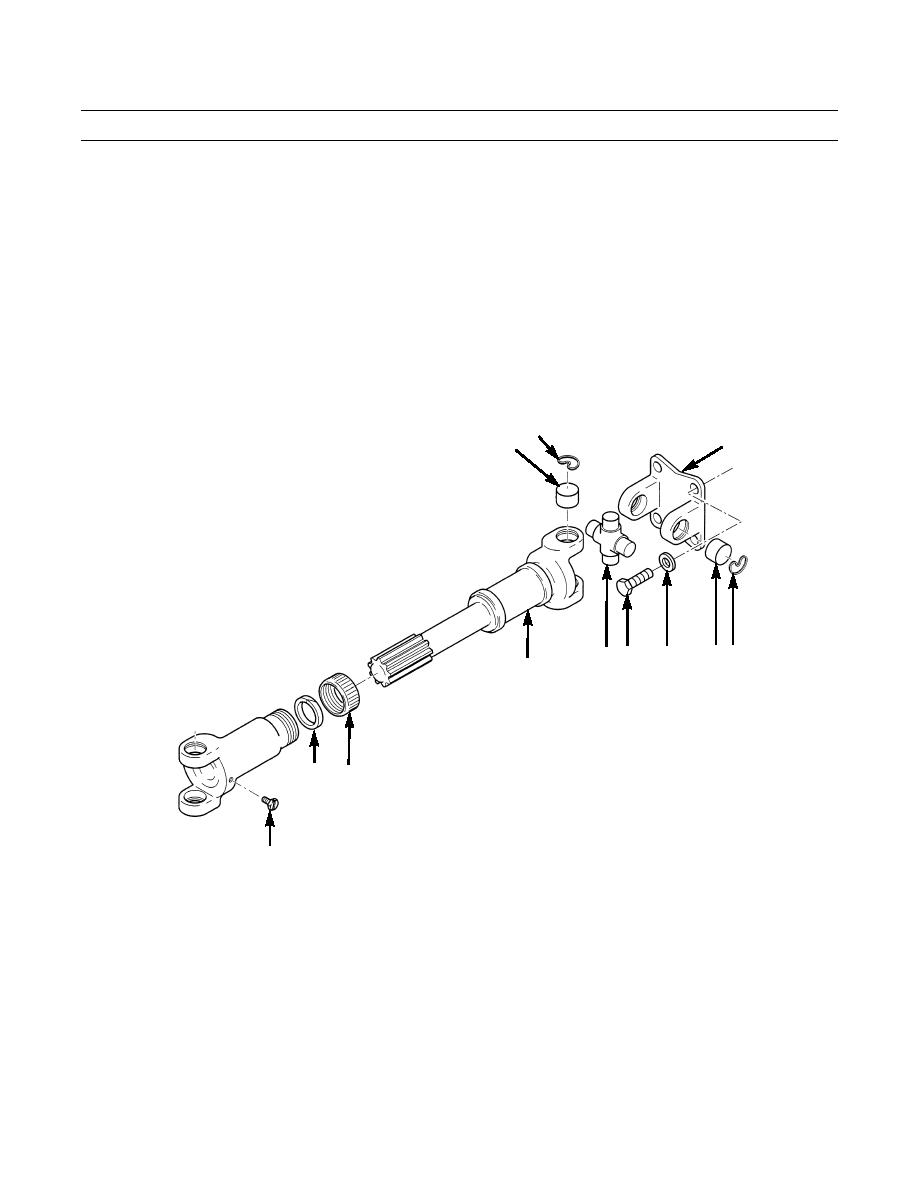
Remove eight bolts (1) and lockwashers (2) from universal yoke (3).
2.
With assistance, remove driveshaft (4) and universal yoke (3) as an assembly from roller.
NOTE
Place driveshaft in vice.
3.
Remove four snap rings (5) from bearing (6) and remove universal yoke (3).
4.
Remove four snap rings (7), bearings (8) and two universal joints (9) from driveshaft (4).
5.
Remove dust cap (10) and preformed packing (11), and separate driveshaft (4). Discard preformed packing.
6.
If damaged, remove plug (12).
7
3
8
2
9 1
6 5
4
11
10
401-2027
12
ASSEMBLY
1.
If required, install plug (12).
2.
Install new packing preformed (11), dusk cap (10) on driveshaft (4). Do not tighten cap at this time.
NOTE
If necessary, apply a light coat of grease to splines to help assist in assembly.
Avoid excess force when assembling driveshaft. If splines are damaged the shaft will not operate cor-
rectly when returned to service.
3.
Spline driveshaft (4) and tighten dust cap (10).
0190 00-2
